Friday, May 24, 2013

Pinterest Inspiration

In high school I loved interior design. Loved it. I actually wanted to go to college and study interior design. I painted bright colored stripes on the walls of my room, which coordinated with the quilt on my bed. I made a few picture displays for my room, and always dreamt of doing more. I loved watching Trading Spaces on TLC, looking for new inspiration.

Then I moved away from home and went off to college. I took an introductory class in Interior Design and decided I liked it more as a hobby, and wasn't so interested in studying. I think the problem there was that the class was all about memorizing furniture styles and time periods, names of pieces, and their designers. It was lame. I took a 160 question test in 20 minutes and got 100% on it- all because it was straight memorization. I wasn't inspired to learn more.

In college I slowly moved away from design. I moved every year, I always rented, and I really didn't have the time or money to spend a lot of focus on sprucing up my space. 

After college, I married Kyle. It was still the same story, no money, no time, and always a rental= no desire to decorate.

Now that we own a house and have been here for almost a year, I'm finally growing tired of the bare walls, and boring furniture. I'm ready to decorate! But I've lost all inspiration and drive.

Today I sidetracked myself slightly by browsing through a couple of my own Pinterest boards, searching for inspiration. Here is some of what has me inspired: (click on the image to follow the link)


Thursday, May 16, 2013

a wedding and a baby

I just love weddings. Love. Love. Love!

Really, if you've known me for a while, like before I ever got married, that statement could possibly surprise you. What would be even more surprising would be me saying that I love babies. I've been known to say that I don't do babies. And I really don't. Just my own. But I love, love, love my own babies.


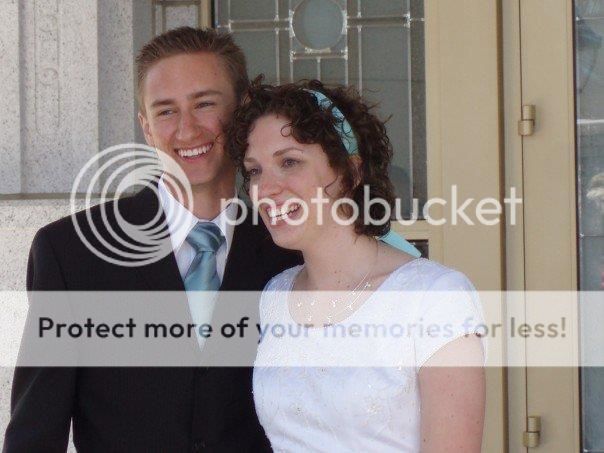
But really, I love weddings. I think they are just so happy and so fun. I always want to get re-married, to my same husband, of course. I just remember how fun my own wedding day was. I was completely unaware of anything going on around me, besides my getting married. My cheeks burned from smiling. It was a fantastic day. Seriously, like the best! 

Kyle and I, six years ago!

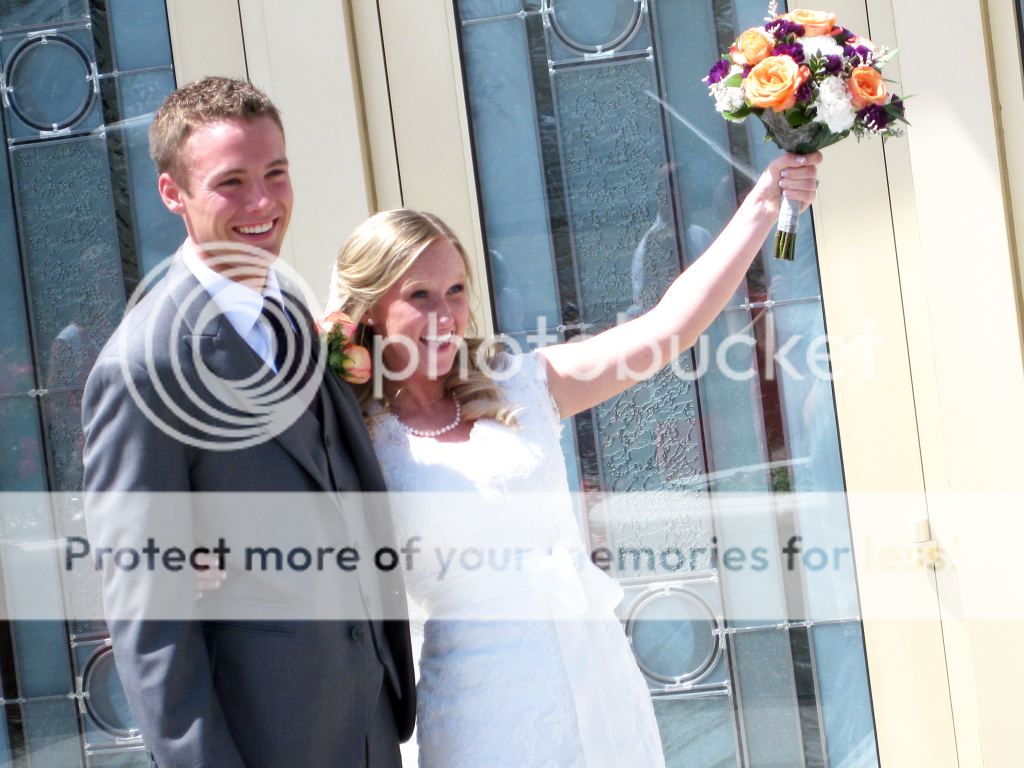
When I learned that my sister-in-law, Chelsie, was engaged I was ecstatic!  Not just because I was super happy for her, because she was happy, but also because that meant I was going to get to go to a wedding, and be a part of it- all of it.


The new couple- aren't they so cute?

Kyle is an industrial designer by profession. I worked for many years, like 7, in copying and printing at BYU, and loved it. Our assignment: to design and print the wedding announcements. Alright!

I started playing around on the computer with some design ideas. Kyle came in, took pieces of them, refined it, and made it look awesome.


We were going for something simple and clean, without being boring. Mission accomplished, in my opinion.  We had the announcements printed with BYU Print Services, and they did a great job. The colors and the print looked great. Everyone was happy.

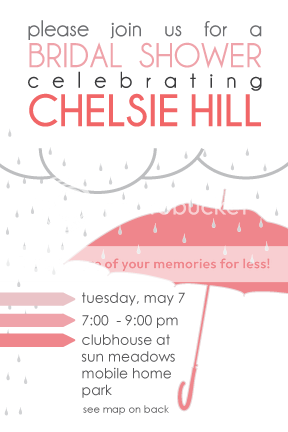
I spent all of last week back home in Washington visiting family and friends, and wedding prepping and partying it up. Included in that was a bridal shower, my other sister-in-law, Brittany, and I threw for bride Chelsie. This is the bridal shower invitation I designed.
The bridal shower turned out really well, and I think everyone enjoyed themselves. I meant to take pictures of it, but I really was too busy getting everything put together to worry about that. It wasn't anything fancy, but there were a lot of people there who love Chelsie, and that is what mattered most.

While I'm sharing, here is the birth announcement I made of our newest daughter, Keira.
I know the color is light and difficult to read on screen, but it printed darker at Costco. I'm still pretty pleased with how it turned out.

Thursday, May 2, 2013

I’m Still Here!

Gah! I didn’t post once in April. Not once! Shame on me.

April was a productive month for us, I’m just not completely ready to share all of the details yet. But, here’s a sneak peak at some of what we’ve been up to.

Stay tuned.

P.S. I really can’t decide on a color scheme for this blog. Any suggestions? 

Friday, March 29, 2013

Hey, You! Follow Along with Me, Ok?

How do you follow your favorite blogs? If you use Google Reader, then I’m sure you’ve already had the news broken to you that Google Reader is going away as of July 1. Sad, sad day.

If you aren’t sure what Google Reader is, that’s ok. Basically, it’s a place to store subscriptions to blogs and websites where you can keep up with the new things being posted. I love it because I’m able to read all of my favorite blogs by going to just one place, instead of having to bookmark them and visit to see if there are any new posts up. Google Reader automatically shows me which blogs have new posts, and I can view those posts directly in Google Reader. It is fantastic.

In place of Google Reader, I’ve switched over to Bloglovin’. Bloglovin’ does pretty much the same thing as Google Reader.

bloglovin'

So far I’m pretty happy with it. It does what I want it to- it lets me keep my blogs all in one place for easy reading.

If you have a bloglovin’ account, I’ve added this blog on there. Click the button below to follow along with me!

Follow on Bloglovin

While we’re at it, if you’re on Pinterest, I hang out there as well.

bloglovin'

I love Pinterest. It was just what I needed. Anyone else have bookmark folders that look like this:

bookmark bar

Where, if you go up or down on that list, the bookmarks go on and on and on…? Pinterest has been fantastic. Instead of adding another bookmark to get lost and sucked away to the deep abyss of my incredibly long list of links, I can add it to my Pinterest account. There I can visually see what the link is, and I can add different boards to organize and categorize my pins, so I can easily find them again. So. Great. Plus what I pinned is shared with my friends, and I can see and repin things my friends have pinned, giving me added exposure to great ideas I may not have seen otherwise.

So, if you’re on Pinterest, click the link below to follow along with me, and see what interests me! 

Friday, March 22, 2013

[Tutorial] Reverse Applique Love Pillows

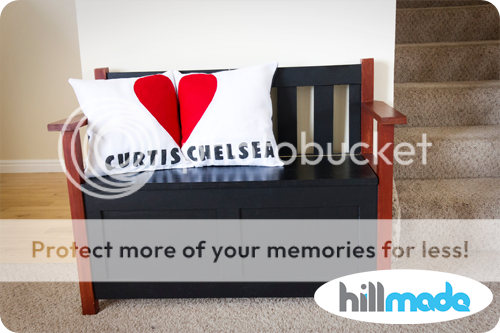
I kind of dropped the ball on Christmas this past year. I was due to have Keira, who was born 12 days before Christmas, and I was feeling extremely unmotivated. I really wanted to sew for family members, but just couldn’t get myself into it. I had ideas for my brother, Curtis and his wife, Chelsea, but I couldn’t decide on anything.

I still really wanted to make something for them. I was thinking home décor, of some sort. So, when I saw these his and hers pillowcases, I got an instant idea and knew that’s what I wanted to sew.


Reverse applique love pillows! I love them. I think I'll have to make a pair for our home as well.

What is reverse applique? Applique is stitching a design cut out from fabric onto another piece of fabric. Reverse applique is cutting out a design from the main fabric and having a secondary fabric sewn to the underside so that it peeks through the cutout. That is what I did. Let me show you how.


Thursday, March 14, 2013

[Recipe] Pineapple Sour Cream Pie

I know I said I was hoping to have pictures (and a tutorial) posted of the pillows I recently made, but I made a mistake. I forgot about Pi Day. (Gasp!)

Seriously? How did I forget!? I have celebrated Pi Day every year since 2004, during my freshman year of college. 9 straight years of Pi Day festivities. Pi Day is one of my absolute favorite holidays. It comes right after Christmas and Thanksgiving (including Canadian Thanksgiving- another tradition that started in college.)

Today is Pi Day! 3.14. (It’s also the birthday of my long time friend, Tiffany. Happy birthday Tiffany!) To celebrate, I want to share with you my favorite pie. Pineapple Sour Cream Pie.


Don’t let the name fool you, it is so good. I’m not a sour cream eater, but I love this pie. Seriously. I make it every Thanksgiving, and for every Pi Day, without fail. Since marrying Kyle, I also make his family’s favorite, Chocolate Pudding Pie. Last year I made individual ones for Kyle’s coworkers. Check it out.

Anyway… On to business.

Pineapple Sour Cream Pie

9” pie crust, baked

filling:
3/4 c. sugar
1/4 c. flour
1/2 tsp. salt
1 c. sour cream
1 tsp. lemon juice
1 can crushed pineapple, undrained
2 beaten egg yolks (make sure to save the whites- you need them for the meringue)

meringue:
2 egg whites
1/2 tsp. vanilla
1/4 tsp. cream of tartar
1/4 c. sugar

For the filling: In a saucepan, mix the sugar and flour. Add everything else except the egg yolks. While stirring, let it cook until thick. Once it is thick, add a few spoonfuls of the mixture to the egg yolks and stir. Add the egg yolks to the entire mixture. Cook it a little bit longer. Let the filling cool.

For the meringue: Using an electric mixer with the whisk beaters, beat the first 3 ingredients to soft peaks. Add the sugar and beat until it is completely mixed.

Pour the filling into a baked pie crust. Spread the meringue on top.

Bake the pie at 350 degrees for 12-15 minutes.


Enjoy! Happy Pi Day!

(The pillows post is coming next week. I pinky promise!)

Thursday, March 7, 2013

Toothbrush-a-saurus!

In my last post, I showed some fabric I had waiting to be cut and sewn. I made some fun pillows with it, that I’m excited to share with you. I just finished them up yesterday. It took me a lot longer to get it done than I had expected. Mostly because life happened and I just couldn’t get to it as often as I would have liked to. But, they are finished and I’m hoping to share it with you sometime next week!

Until then, check out this awesome idea for a toothbrush holder I ran across on Pinterest.

source: parents.com

I was cleaning the bathrooms today and kept thinking about what an awesome idea this is. I just love it! Someday when I get around to organizing the girls’ bathroom I plan to do something like this for them. So fun!

Friday, February 22, 2013

I Have a Project in My Head and Felt on My Table.

[hillmade] coming soon

I picked up some felt at JoAnn’s the other day. I’m excited for what I’m going to do with it. I hope it turns out like how it’s pictured in my head. Prepare for some sewing to come. Yipee!

michael_miller_house_designer_mod_pod_in_malibuMod Pod in Malibu from Michael Miller

P.S. Isn’t this Michael Miller print so fun!? I have no idea what I would ever use it for, but I just love it. I need to think of something to do with it so I can buy some.

Wednesday, February 20, 2013

Sewn Sandwich Bag Toppers

Kyle and I team teach the 12-13 year olds in Sunday School at church. They are fun kids who love to talk (mostly off topic.) We really like to have fun with them and get to know them. We’ve thrown a few homemade pizza parties at our house recently, which are some work, but totally worth it.

I decided to bring in treats this past Sunday. I made my favorite chocolate chip cookies. I wanted to tie them into the lesson somehow, but couldn’t think of anything. So I gave them a quote that went along with the lesson. I decided to put two cookies in a sandwich bag (one for each child), typed up the quote, printed it on cardstock, and sewed it onto the tops of the sandwich bags.

[hillmade] sandwich bag toppers

This is such an easy way to jazz up packaging goodies without a lot of money or extra crafty things. I used the same idea for party favors for Hailey’s friends who came to her birthday party. That time I used clear plastic sacks I found in the party aisle at Target.

[hillmade] sandwich bag topper_cropSorry the stitching is so hard to see.  I used light blue thread that was already loaded on my machine. And I did this in the evening, so the lighting wasn’t very good. Excuses, excuses. I know… :)

Seriously, this is so fun. I think just because it’s quick, easy, and gives good results. I used InDesign, you can use Word, or whatever program you’re comfortable with. Just make your text area the width of your bag, I think my sandwich bags were about 6 1/4 inches. I made them 4 inches tall, so when it is folded over the top of the bag it is 2 inches on either side. Keep your text on the lower 2 inches (the upper 2 inches will be on the back), and leave about 1/2 inch on the bottom for stitching. Print it out on cardstock, cut it out, fold it in half, insert the top of the sandwich bag all the way into the fold and sew a straight line.

[hillmade] sewing sandwich bag topper2

I sewed about 1/4 inch away from the edge.

[hillmade] sandwich bag toppers2

Voila! Super cute packaged cookies.

Thursday, February 14, 2013

[Printable] 4x6 Thank You Cards

We had a baby girl join our family two months ago, yesterday. Yay! We had many people help us out by providing meals and giving gifts to baby girl and her sister. We really feel so blessed to have such great friends and family.

Of course I want to thank each of them for what they have done for us. I finally made some thank you cards to mail out. I feel pretty good that I have them done after just two months. With Hailey, our oldest, I didn’t mail anything out until she was 5 months old! Better late than never, eh?

thank you 4x6

The cards are sized 4x6. They are printed on the front, and blank on the back so I can write a message. I am having them printed at my old home, the copy center at BYU in Provo, UT. I worked there for a total of about 6 1/2 years (off and on a little bit, part-time as a student and later full-time as a non-student). I seriously miss the copy center some days. I have an odd attachment to copy machines and printers.

ANYWAY… I thought I’d share the fruits of my labor with you. Lucky you! :) The file is an 8.5x11 PDF with two 4x6 cards per page (2-up), complete with bleeds and crop marks. Click on the image below to be taken to Google Drive where you can download the file.
[hillmade] thank you 4x6_2-up
Enjoy! And thank you for following along with me!

Wednesday, February 6, 2013

[Recipe] Ham and Cheese Puffs

If Hailey were in charge of what we eat for lunch we would eat pb & j sandwiches every day. I’m usually all for it because it’s quick and easy. But, we need some variety. I found a recipe for Pepperoni Pizza Puffs on Pinterest. We tried it out and loved it. I made the recipe another time with ham and cheddar cheese. We liked them even better.

These puffs are fantastic because not only are they easy to make, but they freeze well. I triple or quadruple the recipe, bag them up, and put them in the freezer. When we’re hungry, we pull out however many we want, heat them in the microwave for approximately a minute, and enjoy!

The recipe says to use mini-muffin cups, but I’ve made them with a regular muffin tin as well. They just need to bake longer. I do prefer the mini ones though. There is something extra fun about mini and bite sized.

[hillmade] Pizza Puffs

Ham and Cheese Puffs
adapted from Plain Chicken

3/4 cup flour
3/4 tsp baking powder
1/2 tsp garlic powder
3/4 cup whole milk (I use what I have on hand, typically 2%)
1 egg, lightly beaten

1 cup cheddar cheese
1 cup diced ham

Pre-heat the oven to 375°. Grease a 24-cup mini-muffin pan. In a large bowl, whisk together the flour, garlic powder and baking powder; whisk in the milk and egg. 
Add the cheese and ham; let stand for 10 minutes.

Stir the batter and divide among the mini-muffin cups. Bake until puffed and golden, 20 to 25 minutes.

Serve with ketchup for dipping and enjoy!

Friday, February 1, 2013

Welcome, welcome!

Welcome to hillmade!

I’ve created this blog as a place for me to share and document what I’m up to in my personal time. Here you’ll find my latest sewing projects, fun activities and things I’m working on with Hailey (and in the future, Keira), and I’ll share some of my favorite recipes. I do want to use this blog as a tie-in to my Etsy shop as well. I have a goal to get new items up for sale in the shop this spring. I’ll post about those as they happen here as well.

This is something I’ve thought about doing off and on for the past year. I finally made the jump because of increased traffic we’ve received on our family blog. The majority of the traffic is coming from Pinterest. I love the attention some of my sewing has received, but I’d like to keep our family blog just that, a blog about our family. The majority of the posts from our family blog that apply to this blog have been transferred over. They are also still accessible on the family blog.

I haven’t been up to much sewing or baking recently. I think I’ve spent only about an hour in front of the sewing machine since Keira was born in December. We’re pretty adjusted now, so that is soon to change, I hope. I have a lot of ideas rolling around in my head, I just need to find the time and the motivation to get started on them.

I do have one recipe to post sometime in the next few days, so watch for that. :)  

Sunday, January 20, 2013

[Recipe] Spelling with Pretzels

One day last week I made a specific effort to do something fun and extra special with Hailey. I had Hailey help me make pretzels. They sounded good, and I thought she’d enjoy rolling out the dough. She loves to play with Play-doh. Making pretzels isn’t much different.

IMG_8864
To make our pretzel making fun and educational, we spelled out our names with the dough. I remember doing the same thing with my mom as a kid. I loved to help her roll out breadsticks and shape them into letters and shapes. It was so fun to sit down at dinner and find the ones I had made. 

Hailey knows how to spell her name, and she knows how to write some of the letters. I thought this would be a fun way to continue to work on that. As we rolled out the dough, we talked about which letter comes next, and how it’s made. I asked Hailey to tell me what the next step was in our letter making (on the letters she knows how to write) and she helped put the dough in place. It was fun! Hailey especially loved eating each of her letters (we stretched it out over a few days).

When we play with Play-doh, this is often what we do. But this was better, because it’s edible. :)

If you’re interested, here’s the recipe we used.

Pretzels
4 tsp. yeast
1 tsp. sugar
1 1/4 c. warm water
3 1/2-4 1/2 c. bread flour (I just used all-purpose and it was fine)
1/2 c. sugar
1 1/2 tsp. salt
1 Tbsp. vegetable oil
4 c. water
1/2 c. baking soda
kosher salt for sprinkling (we used cinnamon and sugar, and garlic salt and shredded parmesan cheese as toppings)

In a small bowl, dissolve yeast and 1 tsp. sugar in warm water. Let stand about 10 minutes. In a large mixing bowl, combine 3 1/2 c. flour, 1/2 c. sugar, and 1 1/2 tsp. salt. Make a well in the center, add the oil and yeast mixture. Mix. Add more flour if dough is too sticky. Knead 3-4 minutes. Cover and let rise until double (approx. 30 minutes). Gently punch down dough. Cut the dough into 12 pieces. Roll each until about 15 inches long and the thickness of your finger. Twist into a pretzel. In a pot, mix water and baking soda. Bring to a boil. Dip each pretzel into boiling soda water for 5 seconds. Place on greased baking sheet, lightly sprinkle with kosher salt and bake for 8-10 minutes at 425 degrees.

Wednesday, January 16, 2013

Our New Food Storage Room

We are so lucky to have a room in our basement we can dedicate to food storage. I’ve wanted to build up a supply of food for a while now, but we just haven’t had the space to do it. Now we can!

Kyle and I talked about getting a freezer for a few months. It was something we wanted, but decided it wasn’t something we could do immediately. Before Keira was born I was really hoping to be able to do some freezer meal cooking. I knew I’d be short on time, patience, and sleep. I didn’t want to throw meal planning into the mix as well. But, the freezer in our refrigerator was already pretty full. There would be hardly any room for pre-made meals.

One day, a few weeks before Keira was born I was surprised with a phone call from my in-laws asking if I’d be around that afternoon and informing me to expect a delivery. They surprised me with an upright freezer for Christmas! Kyle, the little stinker, had been plotting with his parents to surprise me. I was so excited! It came in time for me to make my freezer meals. Hooray!

Before we hooked up the freezer and stocked it, we decided to spruce up the room. It needed some major touch up.

Food Storage Room BeforeBefore.

The concrete floor was stained with paint and whatever else. There wasn’t any trim installed and there were gaps between the sheetrock and the floor. There were a few holes in the wall- one where we’re pretty sure some little mice friends of ours had come through. (Yes! Mice! We caught 5 mice in a two week period earlier this fall. I was disgusted and afraid we’d have to call an exterminator. Luckily they finally stopped showing up.) The mice had left some little presents to remind us of them on the floor, which we of course didn’t want anywhere near our food. The walls were dinged and marked up by who knows what. The room really was pretty sad. There was some existing shelving, but it wasn’t well constructed, and it didn’t fit into our layout of housing a freezer in the room. Kyle reused the wood from those shelves to make some new shelves for general storage in our utility room.

So, Kyle and I decided to gift ourselves a new food storage room. We spent way too much time at Lowe’s, Home Depot, and online looking at flooring. Way too much time. To the point that I was dreaming about it at night. Who knew there was so much to think about and consider. We obviously didn’t. We finally decided on a vinyl adhesive flooring from Home Depot that we could install directly over the concrete. We bought the flooring one evening and Kyle laid it that very same night. He knew I wanted to get the freezer running so I could stock it before Keira was born. He worked hard and fast. He really amazes me sometimes. Ok, pretty much all the time.

Food Storage Room new floor and freezerNew freezer and new floor.

We really should have painted before laying down the flooring, but my mom was staying in the room right next to this room and we didn’t want to inundate her with fumes. After she left Kyle finished the room by giving it a fresh coat of paint with paint we already had in the garage. He then installed trim and new shelving. It looks and feels tons better!

Food Storage Room AfterAfter.

I love it! We have plenty of space to store food, water, and other emergency essentials.

Food Storage Room Shelving

Part of my parent’s Christmas gift to us this year was a start on our food storage. They supplied us with some staple items like flour, rice, oats and salt. A couple of the local grocery stores had case lot sales, so I was able to buy a few cases of some canned goods that we use. We finally have some food storage. Yay!

One more look:

Food Storage Room Before_After

By the way, my mom helped me make and freeze a bunch of meals. It has been a great help. I haven’t had to make many trips to the grocery store or worry over making meals. It’s been fantastic!

Friday, January 11, 2013

My Birthday Present: A Cutting/Sewing Desk

Kyle is awesome. He spoils me. Seriously.

For my birthday this year he made me the best present ever. (Yes, I’m super late in posting this- my birthday is in October.) He made me a cutting/sewing desk! Since I started getting into sewing 2 (or so) years ago I have been cutting fabric on the floor and sewing on a small plastic craft table that jiggles and shakes as you sew. It’s all we ever had room for. Until we moved into our house. Now I have my own sewing space. Kyle was insistent on making a sewing desk for me, and I didn’t complain.

Kyle worked on the desk in the evenings after work. He put a lot of thought and work into the desk. And I love him for it. (And for other things too.)

Here’s my documentation of Kyle’s process. You can tell it took him quite a few days to get it put together based on his change of clothes in each of the pictures.

IMG_8177Working on the garbage cut-out.

IMG_8180Screwing in the front edge piece.

IMG_8182Green painted edge.

Yes, I picked the color. Nice and bright. Although, had I realized how yellowy the urethane would be, I would have picked another color. But, I still love the green regardless of the wood color.

IMG_8191Painting on the polyurethane to protect the wood.

IMG_8234Attaching the legs to the top.

IMG_8237

The finished product. I love it!

The white shelving unit is an IKEA Expedit bookcase. It gives me some cubby holes for storage (which I still need to organize.) Above the bookcase is my cutting area. I was given a new 24x36 inch cutting mat and a 36” ruler from my parents for my birthday.  Now I have plenty of cutting space for most of my projects and it doesn’t kill my back. The cut out in the back is great for sliding my scraps right into the trash. It makes clean up so easy. Next to the cutting area I have my sewing space with room for my serger and sewing machine. Kyle still hasn’t it done it yet, but we plan on drilling holes in the back so I can run my cords up through the bottom, instead of having them hang from the side and get in my way. When I’m not sewing I push the machines to the back and then I have a space for my laptop to sit.

Have I mentioned that I absolutely love my desk? Thank you Kyle! 

Related Posts Plugin for WordPress, Blogger...