Showing posts with label Family Time. Show all posts

Thursday, May 16, 2013

a wedding and a baby

I just love weddings. Love. Love. Love!

Really, if you've known me for a while, like before I ever got married, that statement could possibly surprise you. What would be even more surprising would be me saying that I love babies. I've been known to say that I don't do babies. And I really don't. Just my own. But I love, love, love my own babies.


But really, I love weddings. I think they are just so happy and so fun. I always want to get re-married, to my same husband, of course. I just remember how fun my own wedding day was. I was completely unaware of anything going on around me, besides my getting married. My cheeks burned from smiling. It was a fantastic day. Seriously, like the best! 
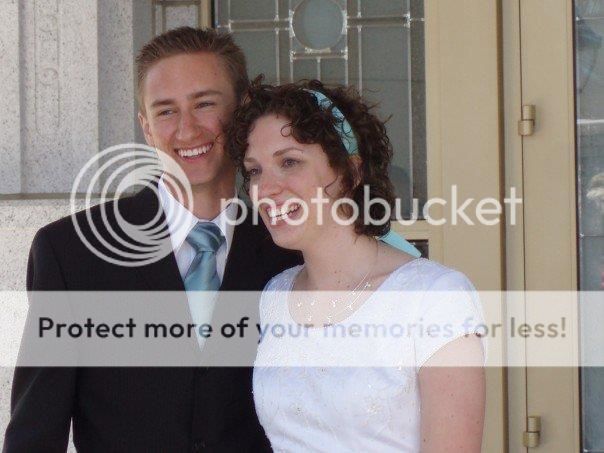
Kyle and I, six years ago!
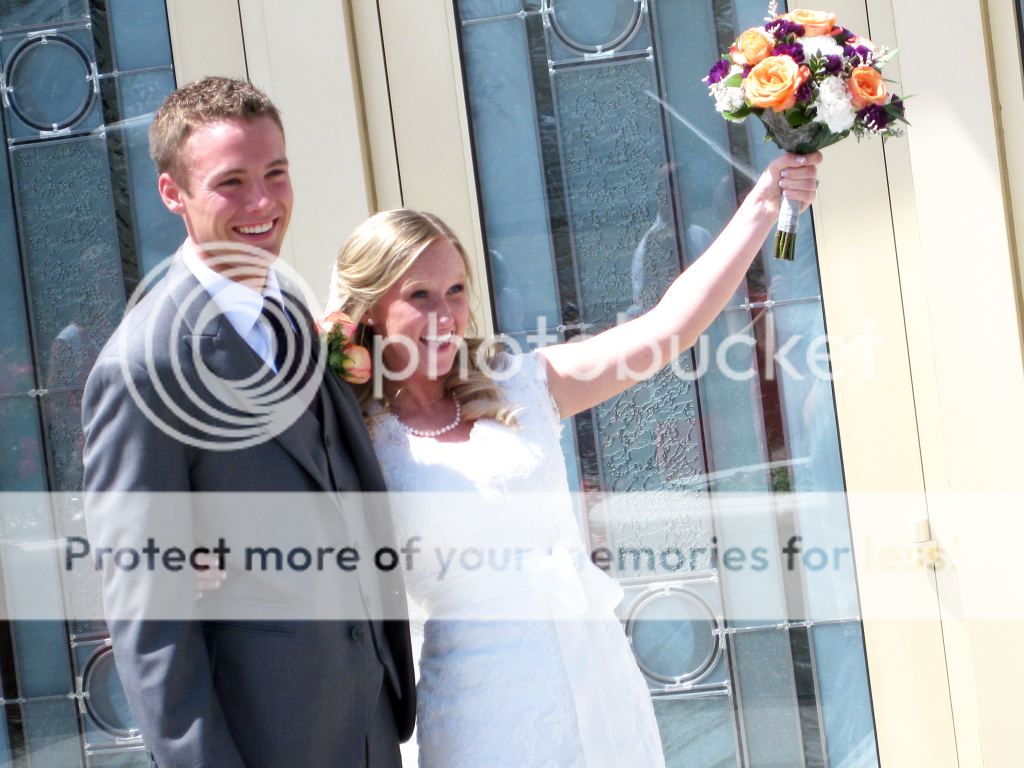
When I learned that my sister-in-law, Chelsie, was engaged I was ecstatic!  Not just because I was super happy for her, because she was happy, but also because that meant I was going to get to go to a wedding, and be a part of it- all of it.


The new couple- aren't they so cute?

Kyle is an industrial designer by profession. I worked for many years, like 7, in copying and printing at BYU, and loved it. Our assignment: to design and print the wedding announcements. Alright!

I started playing around on the computer with some design ideas. Kyle came in, took pieces of them, refined it, and made it look awesome.


We were going for something simple and clean, without being boring. Mission accomplished, in my opinion.  We had the announcements printed with BYU Print Services, and they did a great job. The colors and the print looked great. Everyone was happy.

I spent all of last week back home in Washington visiting family and friends, and wedding prepping and partying it up. Included in that was a bridal shower, my other sister-in-law, Brittany, and I threw for bride Chelsie. This is the bridal shower invitation I designed.
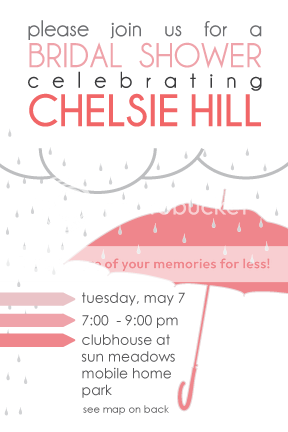
The bridal shower turned out really well, and I think everyone enjoyed themselves. I meant to take pictures of it, but I really was too busy getting everything put together to worry about that. It wasn't anything fancy, but there were a lot of people there who love Chelsie, and that is what mattered most.

While I'm sharing, here is the birth announcement I made of our newest daughter, Keira.
I know the color is light and difficult to read on screen, but it printed darker at Costco. I'm still pretty pleased with how it turned out.

Sunday, January 20, 2013

[Recipe] Spelling with Pretzels

One day last week I made a specific effort to do something fun and extra special with Hailey. I had Hailey help me make pretzels. They sounded good, and I thought she’d enjoy rolling out the dough. She loves to play with Play-doh. Making pretzels isn’t much different.

IMG_8864
To make our pretzel making fun and educational, we spelled out our names with the dough. I remember doing the same thing with my mom as a kid. I loved to help her roll out breadsticks and shape them into letters and shapes. It was so fun to sit down at dinner and find the ones I had made. 

Hailey knows how to spell her name, and she knows how to write some of the letters. I thought this would be a fun way to continue to work on that. As we rolled out the dough, we talked about which letter comes next, and how it’s made. I asked Hailey to tell me what the next step was in our letter making (on the letters she knows how to write) and she helped put the dough in place. It was fun! Hailey especially loved eating each of her letters (we stretched it out over a few days).

When we play with Play-doh, this is often what we do. But this was better, because it’s edible. :)

If you’re interested, here’s the recipe we used.

Pretzels
4 tsp. yeast
1 tsp. sugar
1 1/4 c. warm water
3 1/2-4 1/2 c. bread flour (I just used all-purpose and it was fine)
1/2 c. sugar
1 1/2 tsp. salt
1 Tbsp. vegetable oil
4 c. water
1/2 c. baking soda
kosher salt for sprinkling (we used cinnamon and sugar, and garlic salt and shredded parmesan cheese as toppings)

In a small bowl, dissolve yeast and 1 tsp. sugar in warm water. Let stand about 10 minutes. In a large mixing bowl, combine 3 1/2 c. flour, 1/2 c. sugar, and 1 1/2 tsp. salt. Make a well in the center, add the oil and yeast mixture. Mix. Add more flour if dough is too sticky. Knead 3-4 minutes. Cover and let rise until double (approx. 30 minutes). Gently punch down dough. Cut the dough into 12 pieces. Roll each until about 15 inches long and the thickness of your finger. Twist into a pretzel. In a pot, mix water and baking soda. Bring to a boil. Dip each pretzel into boiling soda water for 5 seconds. Place on greased baking sheet, lightly sprinkle with kosher salt and bake for 8-10 minutes at 425 degrees.

Wednesday, September 26, 2012

A New Doll Bed and Quilt

My Grandpa Park is amazing.

Grandpa Park and Hailey at 6 monthsGrandpa with Hailey (6 months) at my cousin Aubrey’s wedding.

He has a woodshop in his garage and loves working in it. As a wedding gift when all of the grandchildren get married he makes them a wooden bench, which he designed himself. It is a very anticipated and cherished gift.

Grandpa Park's Bench

Grandpa recently designed and has started making doll beds for his great-granddaughters. I got a call from my aunt Leslie one day who said she wanted to stop by our house with Grandpa to deliver a doll bed for Hailey. I didn’t even know he was making one for her. What a great surprise!

IMG_8074

Isn’t it great? The wood is unfinished, so we have full reign over what we’d like to do with it. I think we’ll probably just put a urethane coat over it and keep the wood light.

Hailey loves her doll bed. She has been so motherly recently, so the timing has been great. Hailey loves to wrap her baby up, rock her and then put her to bed when she is sleeping. She will close her playroom door because baby is sleeping and we need to be quiet.

doll bed 2-up

I told Hailey to kneel down by her bed so I could take a picture of her. Next thing I knew she started praying. She asked that baby would “grow big and be healthy”. I thought that was funny.

And then she decided to read baby a “special bedtime story”.

IMG_8096

Since baby now had a bed, she needed a mattress, blanket and pillow to sleep with. I made the mattress using this tutorial from Ana White. It was easy peasy and quick to put together. I made a quick pillow case and used an existing doll pillow we already had (that used to be mine).

For the quilt I decided I wanted to try out making a small herringbone quilt. I think they are fun. I used this tutorial from Bijou Lovely. And I butchered it. Ok… I didn’t really butcher it, but I didn’t put enough thought into what I was doing. The quilt blocks on the tutorial are 12.5 x 12.5, which is great if you’re making a full sized quilt. The doll quilt is small and I didn’t want it to be made up of just a couple of blocks, I didn’t think it would show off the design enough. So, I wanted to do a small scale herringbone quilt. But, I also just wanted to do it quickly and be done with it. So I made the first half of the quilt block and cut that in half. And then I made the second half and cut that in half. When I put it all together it didn’t line up right and it really bothered me. But, I had already cut out my fabric, so I reminded myself that Hailey won’t care and continued on to finish the quilt. When I had all of my mini blocks cut out, I laid them out and really didn’t like the look of it. So, I rearranged them and added white borders to the blocks to space them out enough that the seams didn’t clash. And here is the result:

IMG_8082

Despite turning out totally different than I had planned on, I really do like the quilt. I plan to try again, but this time I’ll think through my strategy better so it actually is a herringbone pattern.

But who cares what I think- Hailey loves it, and that’s all that matters.

IMG_8071

Thank you Grandpa Park for all of your hard work! We love you!

Related Posts Plugin for WordPress, Blogger...