Showing posts with label kids. Show all posts

Wednesday, March 4, 2015

A Spontaneous Birthday Party and Instagram

Need to add some fun to your winter? Throw a simple birthday party, just you and your kids. By simple I mean, SIMPLE. Decorate a little, enjoy some sort of treat, and just make the day feel special. Before you know it, the day will be special. 

Yesterday we awoke to 3-4 inches of snow outside. The girls were thrilled! Immediately after eating breakfast they dressed for the occasion and headed outside to our winter wonderland. 10 minutes later they were done. What were we going to do with the rest of our snow day!? 

Then Hailey informed me it was Leo's birthday.

Leo is one of Hailey's imaginary friends. Don't be misled, Leo is a girl. And apparently yesterday was her birthday. And we were to throw her a party, which of course necessitated decorations.
Oh boy. I drug my feet on that idea. I was in no mood for partying, let alone throwing and decorating our own. Quickly though, Hailey's enthusiasm won me over, so birthday-party-it-up we did. Why do kids have the best ideas sometimes?

We pulled out streamers and ribbon, a plastic tablecloth, and even gift bags for the presents (their own toys wrapped up). Of course, there must be presents! Lucky for those girls I even had cupcakes in the freezer, leftover from Keira's birthday. We thawed those puppies and gave them a nice topcoat of Nutella and sprinkles. Yes, Nutella. No frosting? Use Nutella. It totally satisfied us. It was a bit thicker than frosting, but nothing a glass of milk can't help. :) No cupcakes immediately on hand? Bake some cookies or muffins together and stick a candle in it. If your kids are like my kids, they are quickly satisfied by anything with sugar. 


After cake and presents it was almost lunchtime. I had a few par-baked mini pizza crusts in the fridge, so we decided to use those up and make our own pizzas. This is always a hit with the kids.

Since it was suddenly a special day we pulled out a blanket and picnicked in front of a movie (which never happens). Win-win for me, pizza and some quiet time to relax!


Need a pizza dough recipe? Use mine, it's quick. I can whip up some crusts ready for toppings in just 45 minutes to an 1 hour. I store the extra in the fridge or freezer to be used later. It makes for an extra fun, yet super easy lunch.


So tell me, how do you like to spend your snow day? What do you do to keep you and your kids happy and sane during the winter?

---------------------------------------------------------------------------------------------------

Now, let's talk INSTAGRAM.

Yeah, what about it? 

Well... I'm now on it! Follow me @hillmade_blog. There is plenty I do day to day that doesn't make the blog. I'll post more of that there. I'd also love to see what you're up to! Have you used any of my ideas? Tag #hillmade_blog. I'd love to see it!


Monday, December 15, 2014

Create: Sew a Felt Star Ornament

Boy, it's been a while, hasn't it? I've been here, just busy with life and not taking enough time to document all of it. But! Today I have a simple kids craft to share with you, just in time for Christmas.

Sew a Felt Star Ornament | hillmade.blogspot.com | a beginning sewing project for any age

For her birthday, Hailey asked for a sewing machine. She is 5 and has never touched a sewing machine, but she has watched me and decided she wanted to try. I was not about to spend money on her own machine without seeing her sew first, to be sure this is something she really is interested in. Instead I made her a small sewing kit with some essentials to get sewing. Life became busy and we never found the chance to take some time to sit down together and work on a project. Finally one afternoon in a search for something Christmas crafty for Hailey and her friend to do for some quiet time I decided it was time to pull out some of those sewing supplies and have that first lesson in sewing.

We made felt star ornaments. I'll show you what we did.

You will need:
  • embroidery needles (for the beginning sewer- they are nice and big and easy to hold onto
  • crochet thread (it is found by the yarn and is thicker than normal thread, which makes it easier for little hands to handle. You could use embroidery floss as well.)
  • water soluble/disappearing ink marking pen
  • felt
  • star pattern (print one here)
  • fiberfill (not pictured- whoops!)
Sew a Felt Star Ornament | hillmade.blogspot.com | a beginning sewing project for any age

I began by marking a small dot every 1/4 inch or so around the star on the front and the back. This was to help guide the girls in their needle placement so they would end up with reasonably even stitches.

Sew a Felt Star Ornament | hillmade.blogspot.com | a beginning sewing project for any age

We had a quick chat about the seriousness of using a real needle and I pointed out that the tools used in sewing are not toys. And then I armed them with pre-threaded needles and showed them how to move from one stitch to the next.

Sew a Felt Star Ornament | hillmade.blogspot.com | a beginning sewing project for any age

They loved it. "This is easy peasy banana squeasy!" Oh that made me happy to hear! I was unsure if they would really sit long enough to finish the simple project or if they would lose interest after two stitches.

Sew on they did. I did have to sit right next to them and help them solve their small issues and occasionally gently encourage them to keep going.

Sew a Felt Star Ornament | hillmade.blogspot.com | a beginning sewing project for any age

Once you get about 3/4 of the way around the star stop and squish in a bit of fiberfil to give it some puffiness. Then continue stitching the star closed.

When they sewed all the way around the star we pushed the needle back through the very first point we made, right through the knot.

Sew a Felt Star Ornament | hillmade.blogspot.com | a beginning sewing project for any age

Leaving a small loop of thread to hang the ornament by I slipped the needle underneath the last stitch and tight a knot tightly.

Sew a Felt Star Ornament | hillmade.blogspot.com | a beginning sewing project for any age

Tada! It was finished. The girls were so excited to have sewn an ornament all on their own. Hailey's hangs proudly on our tree. The first thing she did when her dad came home from work that evening was to show off her fine work to him. Fine work indeed!

Sew a Felt Star Ornament | hillmade.blogspot.com | a beginning sewing project for any age

I'm hoping she's game for another sewing project in the future and we'll keep working on those stitches. In the meantime, I think this little star is adorable. It makes my heart happy to see it hanging on our tree. My little beginning sewer's first project. :)

Tuesday, May 13, 2014

Cook | A Quick and Easy Lunch for Kids

Spring is here! (And has been for a little while now.) At our house that typically means that life begins to pick up the pace. When the weather is nice I feel guilty spending the day inside. We have found ourselves at the park, on walks, jogging, bike riding, and hiking the beautiful landscape we live in. Spring also calls for yard work, cleaning and organizing, weddings, graduations, and trips to the local amusement park.

Seriously, I have been finding it difficult to find time to sit down, relax and just breathe. There is always something to be done! I love it- but boy can it be exhausting!

One of the ways I have found to help make the day run smoother is to have quick lunches ready to go. A lot of the time that we decide to go to the park it is a last minute decision. It is typically nearing lunchtime, so of course we have to pack something to take with us. It usually takes twice as long as I think it should. If I have something quick I can grab, then we can get playing quicker and for longer, and then I can also limit the amount of time I have little people at my knees asking if it's time to go yet. :) 


One of the quickest lunches we have are lunchables. Hailey loves to get them from the store, but they can be expensive! Instead of buying them I make my own ahead of time and leave them in the fridge ready to grab and go. Really, it's pretty intuitive, but I have step-by-step pictures for you anyway. :)

Start with a block of cheese, some lunchmeat (I prefer thicker cut meat, it works better) and crackers.


Cut the cheese. (He, he... Not like that! So immature. Cut the cheese... he he...) I cut the block along the long way, so the pieces are short, and then cut those pieces in half. 


If you want to get fancy, to easily cut the meat into circles I have found that my TBSP measuring spoon works great. Press it in and voila- circles! It's ok, you don't have to be fancy, just slice it up into small rectangles. It tastes the same, right?


To avoid being wasteful, I cut up the excess meat left over from cutting circles and save it to put on salads or in eggs.


Bag up the cut meat and cheese and now you have a quick lunch to grab and go.


It makes my kids happy. Making your own little sandwiches is so fun!


Monday, April 21, 2014

Kids | Paper Bag Dresses and the Paper Bag Princess

We love the library. Just about every Thursday morning you can find me and my girls enjoying storytime at the library. While there, we check out a new stack of books each week. Hailey can hardly wait the 5 minute drive home before digging into the new books. She usually asks to look at one or two on the way home.

One book we have checked out a few times is The Paper Bag Princess by Robert MunschThe Paper Bag Princess is about a princess whose castle is destroyed by a dragon. The dragon carries away her prince, who she plans to marry. Everything the princess has is burnt by the fire of the dragon, including her clothes. The only thing to survive the dragon was a paper bag. The princess makes herself a dress from the paper bag and sets off to rescue her prince from the dragon. At the end of the book, after outwitting the dragon and rescuing the prince, the prince is no longer interested in the princess, because she is a dirty mess. The princess doesn't care,  and leaves the prince, no longer intent on marrying him.


What I like most about the story is the idea in the end that the princess knows the prince is wrong. She has a good sense of her own self worth and knows that how she looks is not an important part of who she is.

One afternoon Hailey asked me for an activity to do. We ended up making impromptu paper bag dresses, just like the Paper Bag Princess. You can too!

Make a paper bag dress to go along with the story The Paper Bag Princess by Robert Munsch | hillmade.blogspot.com

We started by ripping open the bottom of the bag.

Make a paper bag dress to go along with the story The Paper Bag Princess by Robert Munsch | hillmade.blogspot.com

Make a paper bag dress to go along with the story The Paper Bag Princess by Robert Munsch | hillmade.blogspot.com

After Hailey tore the bottom open, I used some scissors to cleanly cut away the paper. You should have a tube to look through after the bottom is cut open. (Yes, Keira has marker on her face. That girl loves markes, but she always makes a mess!)

Make a paper bag dress to go along with the story The Paper Bag Princess by Robert Munsch | hillmade.blogspot.com

Then we decorated. We used crayons, markers and stickers. I think paints or stamps would be fun too.

Make a paper bag dress to go along with the story The Paper Bag Princess by Robert Munsch | hillmade.blogspot.com

Make a paper bag dress to go along with the story The Paper Bag Princess by Robert Munsch | hillmade.blogspot.com

Make a paper bag dress to go along with the story The Paper Bag Princess by Robert Munsch | hillmade.blogspot.com

Hailey decided to practice writing and traced the letters on the bag.

Make a paper bag dress to go along with the story The Paper Bag Princess by Robert Munsch | hillmade.blogspot.com

Make a paper bag dress to go along with the story The Paper Bag Princess by Robert Munsch | hillmade.blogspot.com

After we decorated, the dresses were nearly ready to wear. Hailey complained that the top of the bag was digging into her arm pit, so we cut holes in the bag so it would sit more comfortably.

Make a paper bag dress to go along with the story The Paper Bag Princess by Robert Munsch | hillmade.blogspot.com

That's it. Easy peasy, but fun. So go grab some large paper bags, art supplies, and a copy of The Paper Bag Princess and craft away! 

Make a paper bag dress to go along with the story The Paper Bag Princess by Robert Munsch | hillmade.blogspot.com


Monday, March 31, 2014

Kids | Exploring with Non-Newtonian Fluid (Oobleck)

Kyle is the cool kid at our house. He has one of those brains that is constantly dreaming up something new and fun. He loves to see how things work and experiment. Of course, he loves to share all of this with our girls. After dinner one evening, Kyle led us all in some fun with science. 


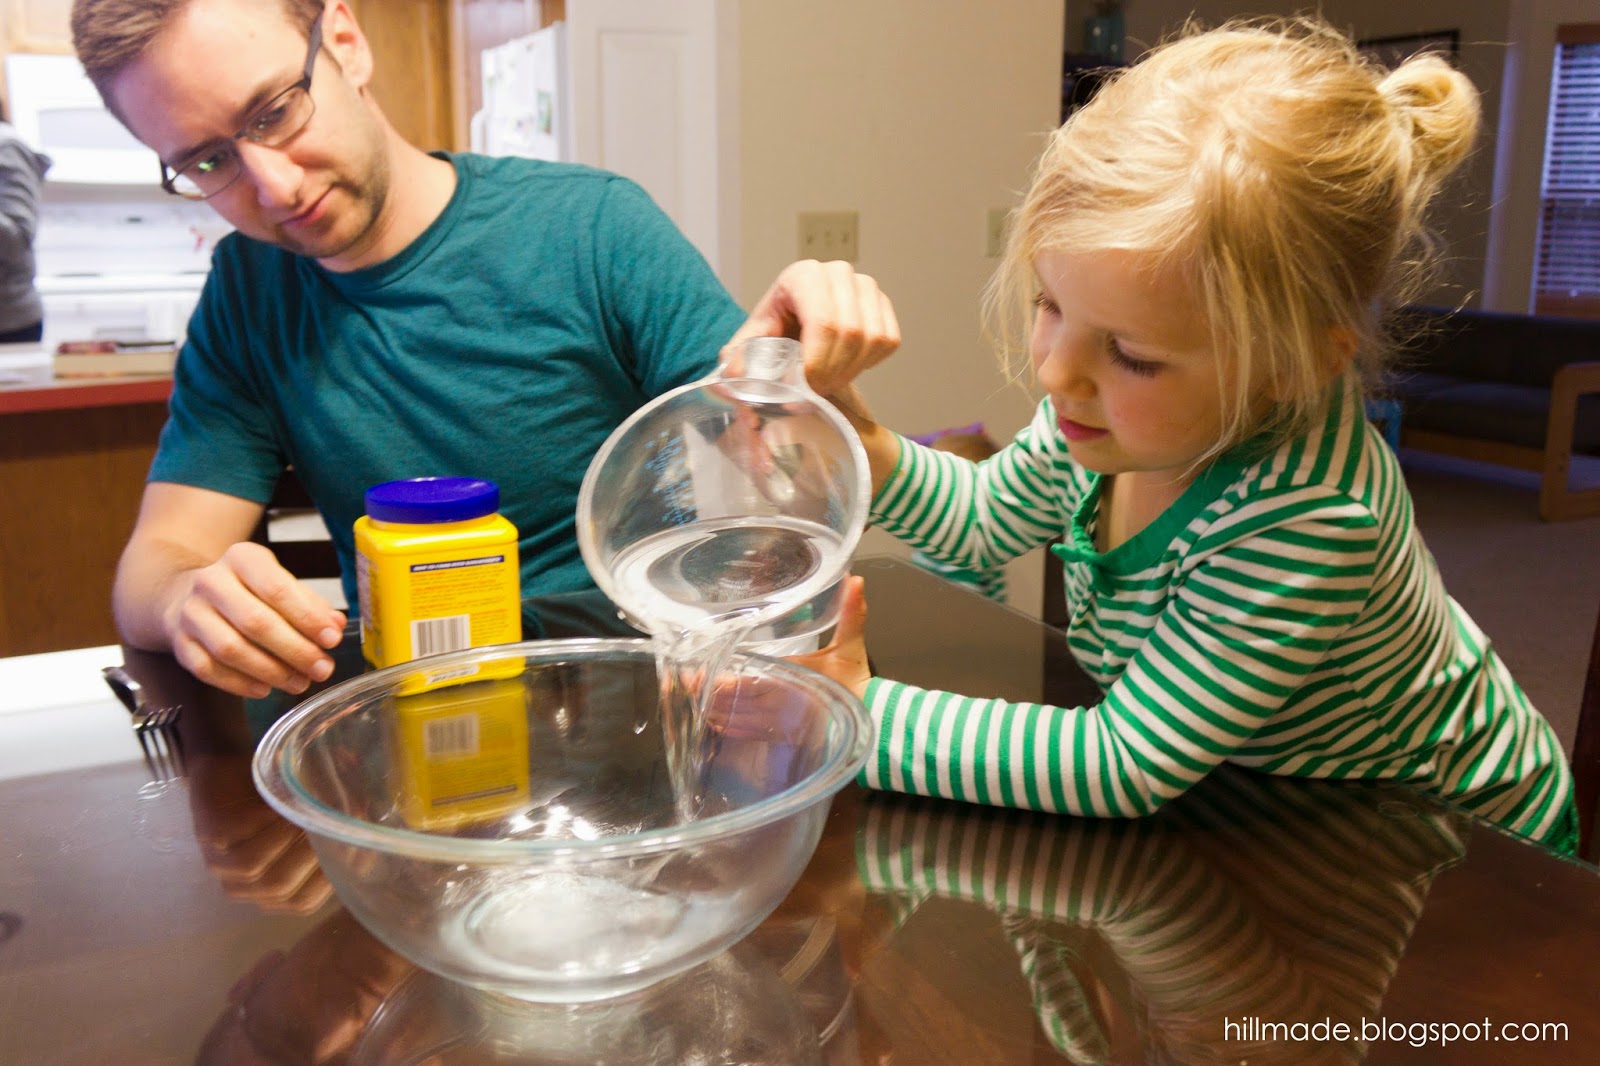
Kyle and I have seen videos of people walking on what looks like liquid. Walking (running really) straight across it. What these people have done is made a large quantity of what is called a non-Newtonian fluid (also known as Oobleck). It is a fluid that when at rest acts as a liquid, but when force is placed upon it, it acts like a solid. It is crazy cool stuff. It's a mixture of water and cornstarch. That's it! 

We played with this stuff for an hour, and only quit because it was bedtime. Hailey would have kept going and going and going... Seriously, if you need to occupy your children for an hour, make them some Oobleck. Or if you would like something fun to do with your children, make some Oobleck. :)

You need:
1 1/2 cups water
16 oz. cornstarch

To make it, grab a large bowl or tub. Pour in the water.  


Add the cornstarch. Start with a little, mix. Add some more, mix. We didn't follow any recipe, we just experimented until it turned out. We used almost the entire 16 oz. of cornstarch.


When the mixture is the right consistency it will pull away from the edges of the bowl.


Now roll up your sleeves, dig your hands in and play!


Try pushing down with your fingers and see how the fluid resists them.


Now relax and watch your finger sink into the goo.


Roll the goo into a ball and watch it ooze out of your hand when you stop rolling. (Sorry the video is choppy, I made it from still images I had taken.)


This stuff is serious fun. I even got into it and had a blast with it. Yes, it's messy, but it cleans right up with water, no scrubbing. Just wet a towel and wipe it away. Now, that's my kind of mess.


If you do just one messy activity with your kids, make it this one! They will love it. You will earn major cool parent points for it. I'm thinking we need to have some friends over and do it again. Anyone want to come play with us!?


Tuesday, March 11, 2014

Kids | A Fun and Simple Matching Game: Steal the Pile

I love to play games. I grew up in a game playing house. When I was in high school, nearly every Sunday evening after dinner our family would sit down and play some sort of game together. Kyle's family is the same way. Sunday evening is game night. Games are a great way to spend time together as a family.

My maternal grandmother was a big game player. We often joked that we wouldn't teach her the rules to a new game we were playing, just to give her a handicap, because she would end up winning anyway. As a child I remember going to her house to visit and playing cards with her. We played with a set of cards that have kittens on them, which were always called the "Kitty Cards". Years after her passing, I have those cards as a special reminder of the fun I had playing cards with my grandma.

The game I remember playing most often with Grandma was Steal the Pile. It is a simple matching game that even small children (preschool age) can pick up on. I have taught Hailey how to play and she loves it. It is one of the games we play most frequently together.

Steal the Pile | hillmade.blogspot.com | A fun and simple matching game for kids of all ages!

Interested in playing? I'll teach you.

1. Start by dealing out 4 cards, face down, to each player. Then deal 4 cards, face up, in the center.

Steal the Pile | hillmade.blogspot.com | A fun and simple matching game for kids of all ages!

2. Each player picks up their hand and compares the cards they are holding with those on the table, looking for matches. 

Steal the Pile | hillmade.blogspot.com | A fun and simple matching game for kids of all ages!

Steal the Pile | hillmade.blogspot.com | A fun and simple matching game for kids of all ages!

3. Players take turns selecting a card from their hand and matching it with one face up on the table. If they have a match they take the matching card from their hand and the other matching card from the table and set them in a pile in front of them.

4. If the player can not match any of the cards face up on the table, they then discard any card in their hand face up on the table, adding it to those already there. 

Steal the Pile | hillmade.blogspot.com | A fun and simple matching game for kids of all ages!

Steal the Pile | hillmade.blogspot.com | A fun and simple matching game for kids of all ages!

5. The twist in the game is that besides matching those cards in the center of the table, you may also match with your opponents pile of cards they have made. If you have a card in your hand that matches the top card of their pile, you may match and steal their entire pile and add it to your own. Thus the name, Steal the Pile.

Steal the Pile | hillmade.blogspot.com | A fun and simple matching game for kids of all ages!

6. After both players have played their initial 4 cards, another set of 4 cards is dealt to each player. Play continues the same as the previous round. Once all of the cards in the deck have been dealt out and played, the player with the most cards wins!

Steal the Pile | hillmade.blogspot.com | A fun and simple matching game for kids of all ages!

Hailey thinks it is so fun to steal my pile. Likewise, she understands it's all in good sport when I take hers away too. It just means she needs to try to get it back!

It did take her a few rounds to completely get the concept, and sometimes I still need to give her a little bit of help. The more we play, the better she is getting at picking up the strategy of the game. 

Steal the Pile | hillmade.blogspot.com | A fun and simple matching game for kids of all ages!

If your preschooler/kindergartener likes to play games, check out the sight word memory game I created. It has been a fun and successful way of teaching Hailey sight words.

Sight Word Memory | hillmade.blogspot.com | A fun way for beginning readers to learn sight words!

Related Posts Plugin for WordPress, Blogger...