


I kind of dropped the ball on Christmas this past
year. I was due to have Keira, who was born 12 days before Christmas, and I was
feeling extremely unmotivated. I really wanted to sew for family members, but
just couldn’t get myself into it. I had ideas for my brother, Curtis and his
wife, Chelsea, but I couldn’t decide on anything.
I still really wanted to make something for them. I was thinking home décor, of some sort. So, when I saw these his and hers pillowcases, I got an instant idea and knew that’s what I wanted to sew.

Reverse applique love pillows! I love them. I think I'll have to make a pair for our home as well.
What is reverse applique? Applique is stitching a design cut out from fabric onto another piece of fabric. Reverse applique is cutting out a design from the main fabric and having a secondary fabric sewn to the underside so that it peeks through the cutout. That is what I did. Let me show you how.
I still really wanted to make something for them. I was thinking home décor, of some sort. So, when I saw these his and hers pillowcases, I got an instant idea and knew that’s what I wanted to sew.
What is reverse applique? Applique is stitching a design cut out from fabric onto another piece of fabric. Reverse applique is cutting out a design from the main fabric and having a secondary fabric sewn to the underside so that it peeks through the cutout. That is what I did. Let me show you how.

You will need:
- (2) pillow forms (I used 14" x 14")
- 3 colors of felt (one for the main color, one for the lettering color, and one for the heart)
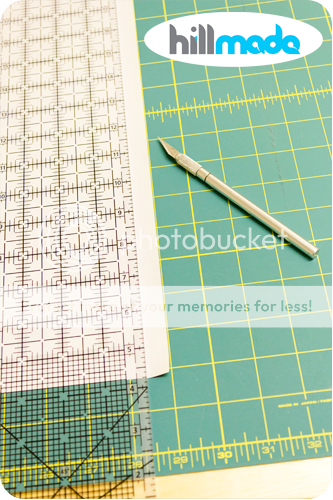
- fabric marking pen
- wonder under
- needle for hand sewing
- letters printed out from the computer, and cut out. You'll need to use some sort of word processing program (like Word.) This will take a little bit of guess and check to get them sized right.
Cut out the front and back pieces for the pillows (2 fronts, 2 backs.) My pillow forms were 14"x14", so, thinking of seam allowance, I cut my pieces to be 14.75"x14.75". I ended up with some extra room, so you could cut them to be the exact same size as your pillow forms and be just fine.
Step 2:
I used wrapping paper to draft a pattern for each side of the heart. Using an exact-o knife, I cut the wrapping paper to be the added length of both pillows together + one inch, by the height of the pillow + one inch. (My pillows were 14" x 14", so the cut size of the wrapping paper was 15" x 29". My math was, 14+14=28, 28+1=29, 14+1=15.)
Step 3:

Fold the wrapping paper in half hamburger style (Lengthwise? I always get confused.) Ignore my picture, it isn't quite right, I didn't double the length the first time and forgot to take a new picture the second time.
Draw half of the heart. You have to over-exaggerate the dip in the middle, due to the seam allowance and rounding of the pillow. Again, I didn't do that in this picture. You can see the exaggeration in later pictures.
Step 4:

Cut the heart out, cut it in two, so you have two separate halves. Layout the heart and letters on the pillows to see how it all fits. Make any adjustments to it. When you're happy with the layout, move on to step 5.
Step 5:
Cut out 2 pieces of wonder under that are the approximate size of the lettering on each pillow. You don't have to be exact here, you just want it to be big enough that you can cut out all of your lettering from it, spaces between letters included.
Cut the secondary color of felt to the same size as the wonder under. For me this was dark gray.

According to the package directions, iron one piece onto the wrong side of each front piece. Place the wonder under higher than you think it should be. With the curve of the pillow, it looks better to have it higher. I didn't iron the wonder under high enough in the above picture. Make sure that the height is the same for both pillows, you want your text (and heart) to match up when they are placed next to each other.
Step 6:

With your fabric marking pen, trace the heart onto the wrong side of your fabric. Measure the top and bottom, so the heart is even on both pillows.
Layout your letters onto the wonder under and pin in place. Don't forget to mirror image everything!
Make sure that you measure and line the letters up straight. I laid out my ruler and lined up the letters with the same marking on the ruler. You also need to be sure to measure and place the letters on both pillows at the same height from the bottom of the pillow.
Step 7:

With a regular writing pen, trace around the letters onto the wonder under.
Step 8:

Cut out the heart and lettering. If you turn your fabric right side up, it should look similar to this picture.
Step 9:

Peel the paper backing off of the wonder under. According to package directions, iron on the secondary felt color to the wonder under. I had to snip it a little bit where it ran into the heart cut out.
Step 10:

Using the felt color for the heart, cut out a rectangle large enough to cover the heart, plus some. I cut mine to be the height of the pillow plus an inch or two wider than the widest point on the heart.
Pin the felt, right side up, to the wrong side of the front piece of felt, like shown in the above picture.
Step 11:

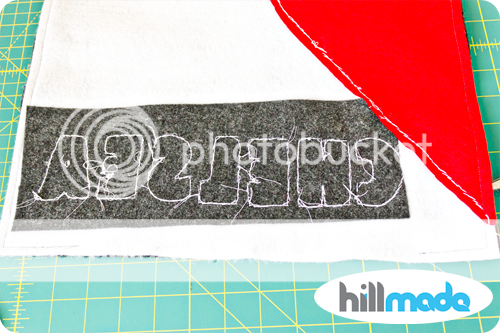
Hand stitch (or machine stitch) around the edge of all of the letters and the heart. Trim off any excess red fabric on the underside.
I started out machine stitching this, but it was too small and tight for me to make it look good. So, I unpicked and settled on hand stitching instead. It took longer, but looked so much better.
Step 12:

Grab your back piece, and place it, with the front piece, right sides together. Starting on the bottom, stitch around the perimeter. Make sure to leave a big enough gap on the bottom to be able to fit the pillow form through. (The picture below illustrates this.)
Step 13:

Clip the corners, and turn it right side out. Iron the edges flat, turning the bottom opening under.
Step 14: LAST STEP!

Stuff in the pillow form. Pin the opening closed, to help it stay in place. Hand stitch it shut.
All done!
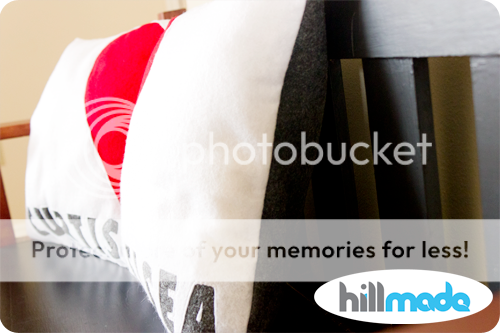
Enjoy your pillows and display them somewhere fun!

Those. Are. AWESOME! I was kind of wondering why you would go through all the effort for the reverse applique, but the close up pictures tell the story. :)
ReplyDeleteThanks Jessie! The reverse applique was a lot of work, but I really like the texture it adds. But, to be honest, at one point I did think to myself, why did I do it this way? It could have been so much easier to do it differently. No regrets though. A lot of extra work, but fun work. I still might make some more with another method. We'll see.
DeleteThat's so cool, Renae! I'm tired just reading about it - looks like a lot of work. But it looks awesome!
ReplyDelete